How to Create and Work with Symbols
·3 min read
Do you know what symbols are in Vectorworks?
A symbol is an object created from one or more drawing elements, similar to a group. However, symbols have some special characteristics: • They update automatically, which means that when you change a symbol, all of its copies in the same document are changed as well. • We can insert symbols (such as doors and windows) into walls. Vectorworks automatically opens the necessary opening for inserting these objects. • Symbols created in one document can be used in other documents. • Symbols can be counted in tables, for budgeting or simple quantity takeoffs.How to create a regular symbol
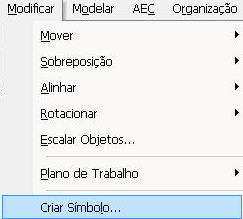
To create a symbol, you first need to make its drawing (for example, the drawing of a door or of a table and chairs set). Select the objects to create the symbol and go to the menu Modificar/Criar Símbolo... (Modify/Create Symbol...) (figure 1).
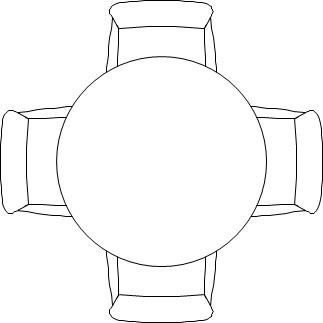
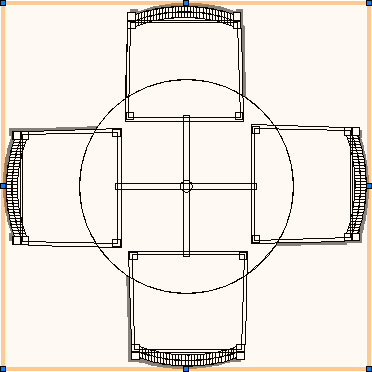 figure 1 - Creating the symbol.
In the window that opens, set:
Name (Name): Give your symbol a name;
Insertion Point (Insertion Point): Choose whether your symbol's insertion point will be created from the Plan Projection Center (Plan Projection Center) or the Next Mouse Click (Next Mouse Click);
Units (Units): Choose whether the symbol's measurements will be tied to the Page (Page) size or linked to Global (Global) units;
Insert in Walls (Insert in Walls): Turn on this checkbox if you want the symbol to be inserted into walls; then choose whether this insertion will be On Line Center (On Line Center) or On Edge (On Edge). Also set how the Wall Breaks (Wall Breaks) will behave;
Leave Instance in Place (Leave Instance in Place): This option places a copy of the symbol in the same spot where the original was drawn. With this option off, the original drawing disappears, and the symbol can be retrieved from the Resource Browser (Resource Browser) palette, Ctrl+R;
Change 2D Objects from Layer Plane to Screen Plane (Change 2D Objects from Layer Planne to Screen Plane): Turn on this checkbox to make all 2D objects currently linked to the layer plane switch to the screen plane. This is particularly useful when you're creating hybrid symbols.
Convert to Group (Convert to Group): Makes this symbol become a group once inserted.
Assign To (Assign To): Places the created symbol immediately in the Active Class (Active Class) or in another class, set in Custom Class (Custom Class).
Click OK (figure 2).
figure 1 - Creating the symbol.
In the window that opens, set:
Name (Name): Give your symbol a name;
Insertion Point (Insertion Point): Choose whether your symbol's insertion point will be created from the Plan Projection Center (Plan Projection Center) or the Next Mouse Click (Next Mouse Click);
Units (Units): Choose whether the symbol's measurements will be tied to the Page (Page) size or linked to Global (Global) units;
Insert in Walls (Insert in Walls): Turn on this checkbox if you want the symbol to be inserted into walls; then choose whether this insertion will be On Line Center (On Line Center) or On Edge (On Edge). Also set how the Wall Breaks (Wall Breaks) will behave;
Leave Instance in Place (Leave Instance in Place): This option places a copy of the symbol in the same spot where the original was drawn. With this option off, the original drawing disappears, and the symbol can be retrieved from the Resource Browser (Resource Browser) palette, Ctrl+R;
Change 2D Objects from Layer Plane to Screen Plane (Change 2D Objects from Layer Planne to Screen Plane): Turn on this checkbox to make all 2D objects currently linked to the layer plane switch to the screen plane. This is particularly useful when you're creating hybrid symbols.
Convert to Group (Convert to Group): Makes this symbol become a group once inserted.
Assign To (Assign To): Places the created symbol immediately in the Active Class (Active Class) or in another class, set in Custom Class (Custom Class).
Click OK (figure 2).
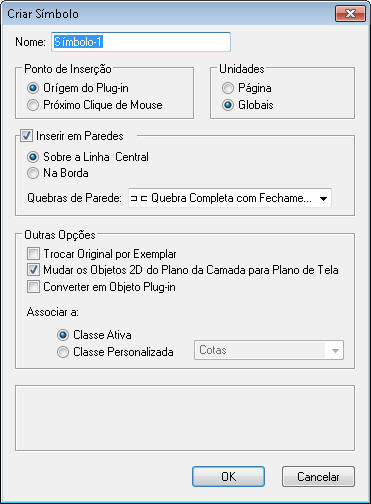 figure 2 - Symbol configuration window.
If you still have the object selected, notice that its name now appears in the Object Info (Object Info) palette, Ctrl+I (figure 3).
figure 2 - Symbol configuration window.
If you still have the object selected, notice that its name now appears in the Object Info (Object Info) palette, Ctrl+I (figure 3).
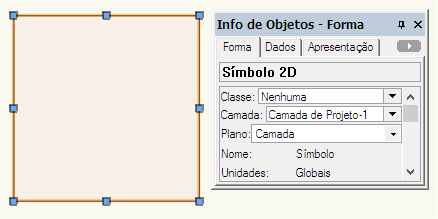 figure 3 - Symbol created.
Did you like this post?
It was based on the topic Resources to increase productivity, Creating and editing hatches, tile patterns and gradients, which is part of the book Vectorworks passo a passo, available in print or e-book. For more information or to purchase the book, visit the site www.livrovectorworks.com.br
figure 3 - Symbol created.
Did you like this post?
It was based on the topic Resources to increase productivity, Creating and editing hatches, tile patterns and gradients, which is part of the book Vectorworks passo a passo, available in print or e-book. For more information or to purchase the book, visit the site www.livrovectorworks.com.br


