New Resource from an Image
·3 min read
Learn how to create a resource in Vectorworks!
Hatches, tile patterns, gradients, and images are types of graphic attributes stored and managed by Vectorworks in the form of resources. Each attribute mentioned above is saved as a resource, which lives inside a drawing file — either your current working file or some other one added to the bar as a favorite. Whenever you insert an attribute into your project, the resource related to it is stored in the file. This way, every Vectorworks project always carries with it all the resources being used.Creating a new resource
Go to the menu Window/Palettes/Resource Browser (Window/Palettes/Resource Browser) Ctrl+R (figure 1).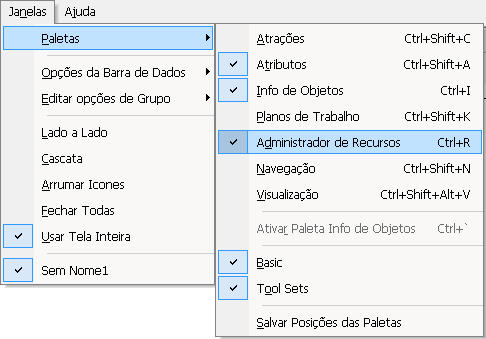 figure 1 - Window/Palettes/Resource Browser menu
Click the arrow next to the word resource and hover over the New Resource in... (New Resource in...) option, then choose Image... (Image...) (figure 2).
figure 1 - Window/Palettes/Resource Browser menu
Click the arrow next to the word resource and hover over the New Resource in... (New Resource in...) option, then choose Image... (Image...) (figure 2).
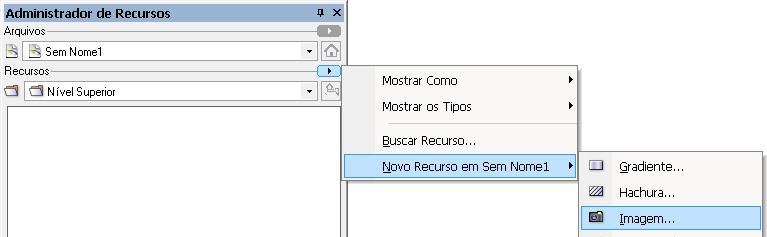 figure 2 - Creating a new resource.
In the new window, locate the image file you want to import and then click Open (Open) (figure 3).
figure 2 - Creating a new resource.
In the new window, locate the image file you want to import and then click Open (Open) (figure 3).
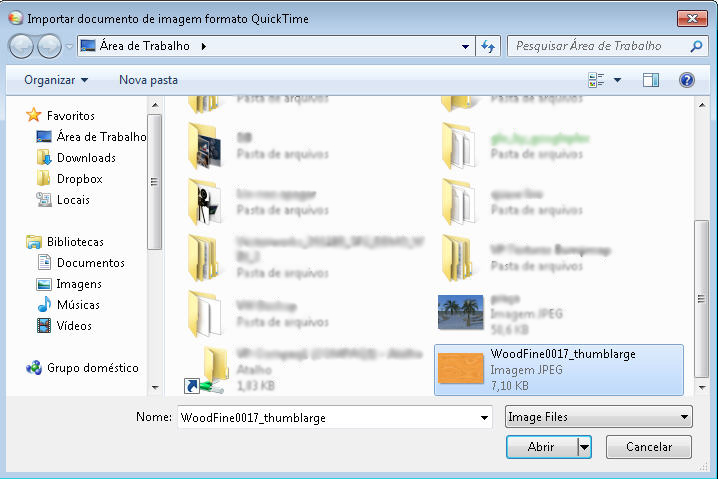 figure 3 - Locating the image.
In this window, you should choose (figure 4):
figure 3 - Locating the image.
In this window, you should choose (figure 4):
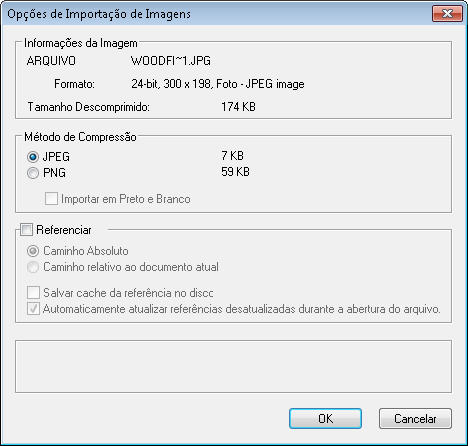 figure 4 - Image import options.
Compression Method (Compression Method): Compression format for the image within your project;
Reference (Reference): Turn on this checkbox if you don't want Vectorworks to store the image inside the file. This way, the program will need to know how to find it every time your project is opened.
Absolute Path (Absolute Path): Makes Vectorworks always look for the image in the same place where it was found the first time it was imported;
Path relative to current document (Path relative to current document): Makes Vectorworks look for the image based on its position on the computer relative to the document;
Save referenced cache to disk (Save referenced cache to disk): Saves a smaller version of your image in the document;
Automatically update reference file open (Automatically update reference file open): This option makes the document automatically look for all referenced images as soon as it's opened.
Click OK to confirm the image creation.
See in the Resource Browser (Resource Browser) palette that the image is saved in your file's resources area (figure 5).
figure 4 - Image import options.
Compression Method (Compression Method): Compression format for the image within your project;
Reference (Reference): Turn on this checkbox if you don't want Vectorworks to store the image inside the file. This way, the program will need to know how to find it every time your project is opened.
Absolute Path (Absolute Path): Makes Vectorworks always look for the image in the same place where it was found the first time it was imported;
Path relative to current document (Path relative to current document): Makes Vectorworks look for the image based on its position on the computer relative to the document;
Save referenced cache to disk (Save referenced cache to disk): Saves a smaller version of your image in the document;
Automatically update reference file open (Automatically update reference file open): This option makes the document automatically look for all referenced images as soon as it's opened.
Click OK to confirm the image creation.
See in the Resource Browser (Resource Browser) palette that the image is saved in your file's resources area (figure 5).
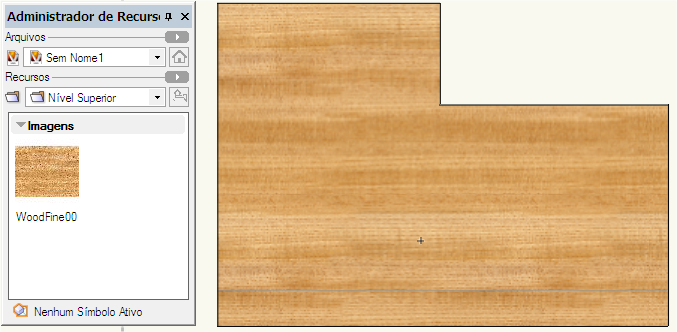 figure 5 - Resource Browser and image applied as a texture.
To apply the image to an object, select it and then double-click the image thumbnail in the Resource Browser (Resource Browser) palette. You can also click the image thumbnail and drag it onto the object to apply it.
NOTE 1 From the second time you import an image onward, a window appears asking whether you want to Import an Image File (Import an Image File) or Reuse an Image From Another Resource (Reuse an Image From Another Resource).
NOTE 2 In the window that opens, choose Import an Image File (Import an Image File) and then click OK.
figure 5 - Resource Browser and image applied as a texture.
To apply the image to an object, select it and then double-click the image thumbnail in the Resource Browser (Resource Browser) palette. You can also click the image thumbnail and drag it onto the object to apply it.
NOTE 1 From the second time you import an image onward, a window appears asking whether you want to Import an Image File (Import an Image File) or Reuse an Image From Another Resource (Reuse an Image From Another Resource).
NOTE 2 In the window that opens, choose Import an Image File (Import an Image File) and then click OK.



