ARCHICAD: How to Create and Edit Pens and Colors

In this post, we'll cover a very interesting and, at times, somewhat tricky topic in ARCHICAD: how to create and edit Pens and Colors.
[caption id="" align="alignleft" width="177"] This post is an adaptation of the original text from the book ARCHICAD passo a passo – volume I, by João Gaspar, Natália Turri Lorenzo, and Hingrid Silveira Soares.[/caption]
To configure line weights and colors in a file, ARCHICAD works with a very interesting concept called a Pen Set. A pen set can have up to 256 configured pens, and each pen has a number; for each pen, you can choose the line weight and color.
An ARCHICAD file can have several pen sets, each with the same 256 positions. The idea is that each pen set stores different graphic information (weight and color) to be used in different views of the model.
You can have specific pen sets to use in the same representation of floor plans, sections, electrical installation drawings, furnished plans, etc.
Why are there so many pens in ARCHICAD, and why do pen sets exist?
All ARCHICAD objects use pens to have their elements drawn. You choose the pen for each part of an object in the Settings (Settings) window. For example, you might determine that the pen used to draw the lines in a door's view is pen 63.
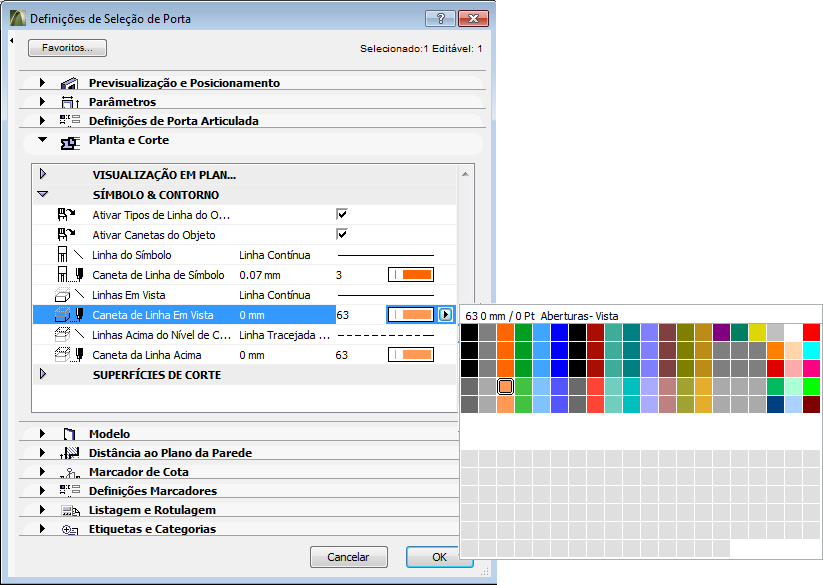 figure 1 - Settings menu for the Door toolEach drawing space in your ARCHICAD project (it can be a story in the project map, a view in the view map, or in the layout book) can use a different pen set.
This way, you might want to use, in the project map, a pen set called Conceptual (which already comes in the ARCHICAD template), in which all lines are thin and colored (so that you can easily identify different objects), and you might want the same view in the layout book to use another set, in which all lines are black, with different weights (so they can be printed).
figure 1 - Settings menu for the Door toolEach drawing space in your ARCHICAD project (it can be a story in the project map, a view in the view map, or in the layout book) can use a different pen set.
This way, you might want to use, in the project map, a pen set called Conceptual (which already comes in the ARCHICAD template), in which all lines are thin and colored (so that you can easily identify different objects), and you might want the same view in the layout book to use another set, in which all lines are black, with different weights (so they can be printed).
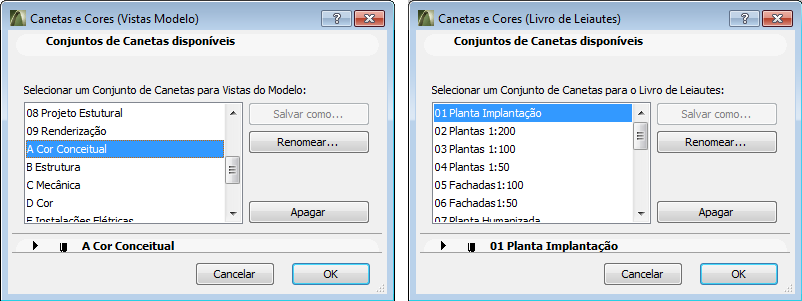 figure 2 - different pen sets for different views
This way, you'll notice that the same pen 63 (which, in our example, draws the lines in the door's view) will have a thin, colored line in the Conceptual set, but will have a gray color in the Floor Plans 1:50 set, for example.
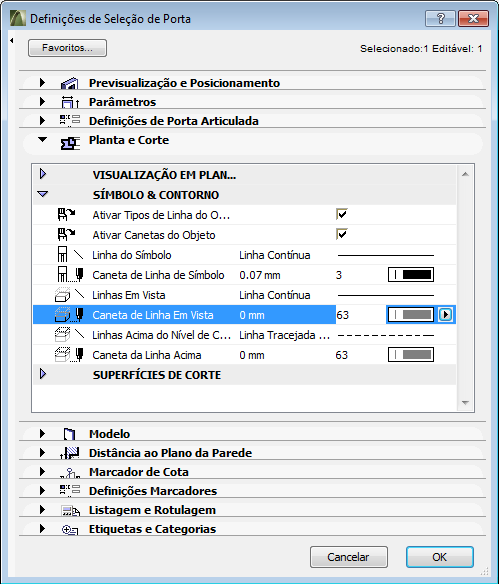 figure 3 - Settings menu for the Door tool
Good use of pen sets makes the project gain agility and presentation quality, avoiding the need to duplicate files of the same model just to change the line weight and color settings.
ARCHICAD already comes with several pen sets configured that are very useful. Check out below how to create or edit pen sets.
how to create a pen set
Go to the Options/Element Attributes/Attribute Manager... (Options/Element Attributes/Attribute Manager) menu.
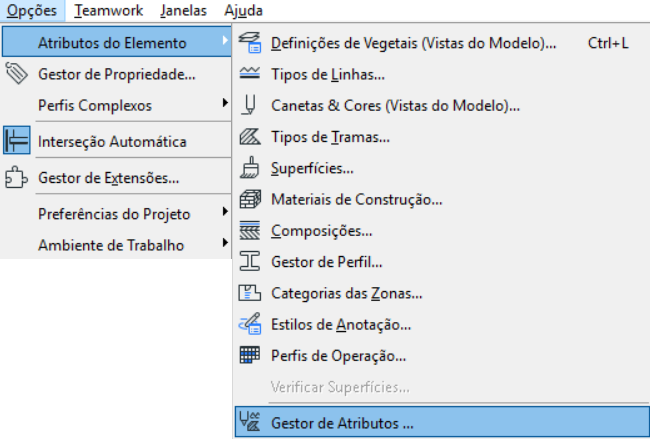 figure 4 - location of the Attribute Manager
In the window that opens, select a pen set you want to use as a reference and then click Duplicate (Duplicate).
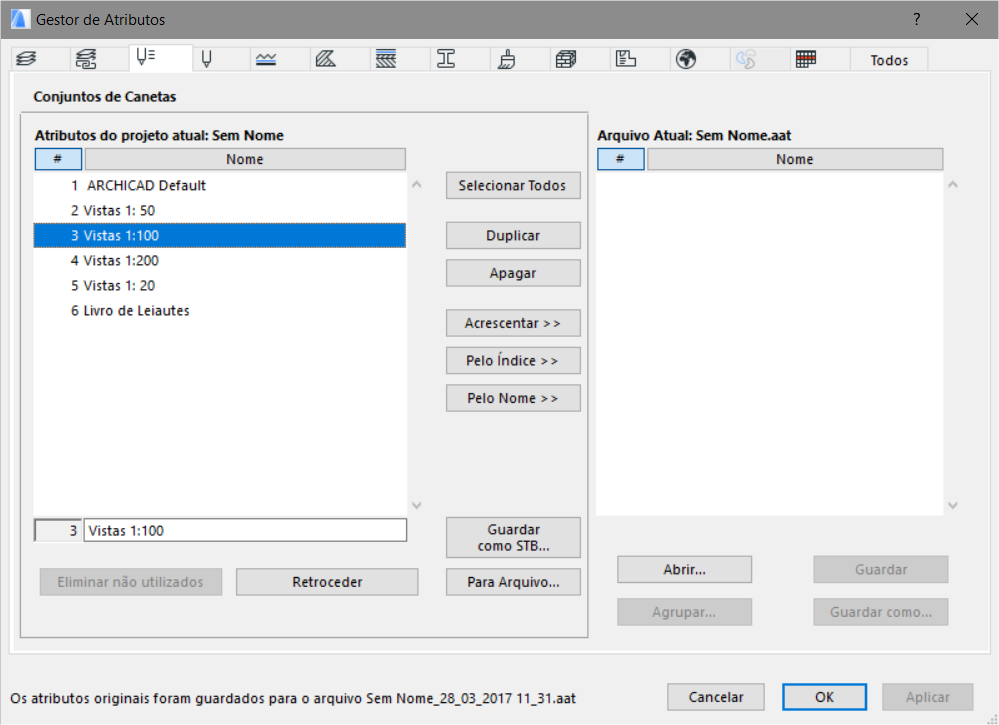 figure 5 - Attribute Manager/Pen Sets
You can't give the pen set a new name in this window; that will be done in the next step. Click OK to finish. A new window may appear asking you to confirm the action. Click Create (Create).
 figure 6 - confirmation window for changes to Pen Sets
Now, go to the Options/Element Attributes/Pens & Colors... (Options/Element Attributes/Pens&Colors...) menu.
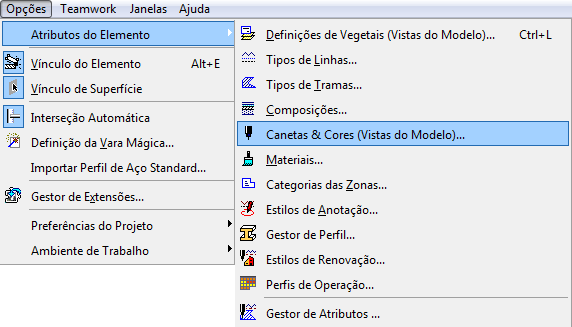 figure 7 - location of the Pens & Colors settings
In the window that opens, click on the pen set you just created and then click Rename (Rename).
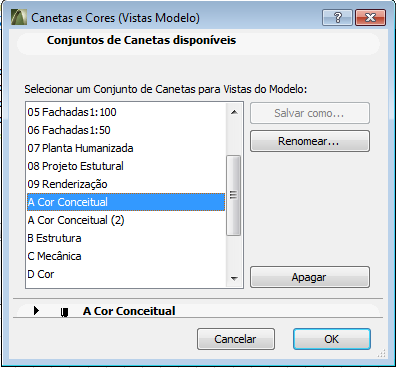 figure 8 - Pens and Colors settings
Give the set a new name and click OK.
how to create or modify a pen
Go to the Options/Element Attributes/Pens & Colors... (Options/Element Attributes/Pens&Colors...) menu.
In the window that opens, click on the pen set you want to work with, creating or modifying the settings of a pen. Each square (or box) in this area of the window represents a pen.
Click the desired box to create or modify the related pen. Notice that each box has a number associated with it, which is the pen number. Adjust Pen Wt. (Pen Weight), where you enter the desired line weight; Edit... (Edit color...), choose the pen color, and Description (Description), give a name to the pen.
figure 9 - location of the Pens & Colors settings
In the window that opens, click on the pen set you want to work with, creating or modifying the settings of a pen. Each square (or box) in this area of the window represents a pen.
Click the desired box to create or modify the related pen. Notice that each box has a number associated with it, which is the pen number. Adjust Pen Wt. (Pen Weight), Edit... (Edit color...) and Description (Description).
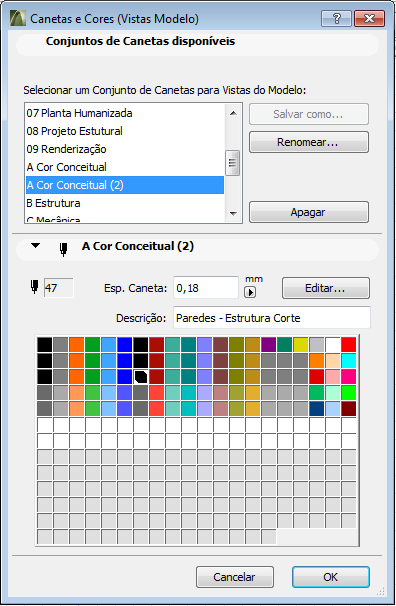 figure 10 - Pens and Colors editing window


