Creating and Editing Tiles
·4 min read
Tiles are a type of graphic attribute stored and managed by Vectorworks in the form of resources, and they are saved within a drawing file, which can be your current working file or another one added to the palette as a favorite. But do you know how to edit tiles or create new tiles? Check it out below:
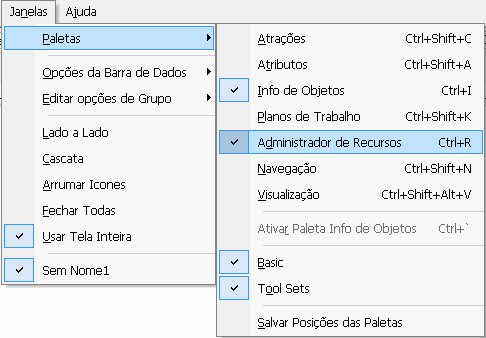
Go to the menu Windows/Palettes/Resource Browser (Windows/Palettes/Resource Browser) Ctrl+R (figure 1).
figure 1 - Window/Palettes/Resource Browser menu.
Click the arrow-shaped button next to the Resources (Resources) title; move the cursor over the New Resource in... (New Resource in...) option and then choose the Tile... (Tile...) option (figure 2).
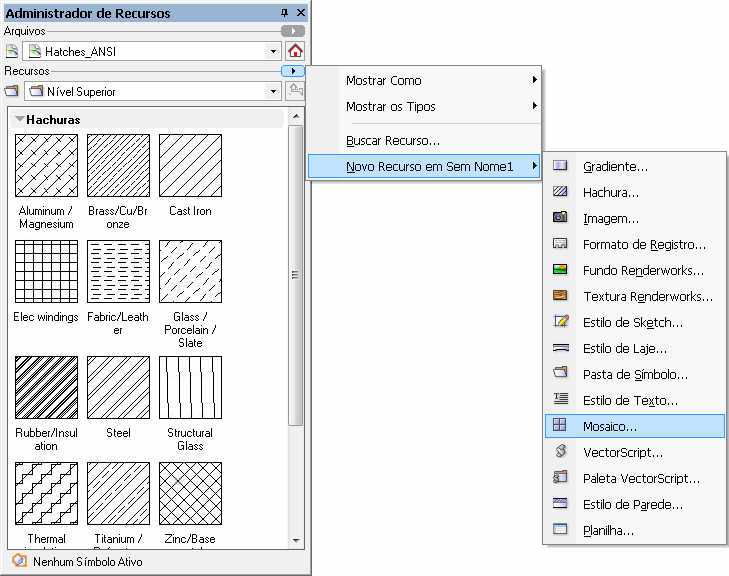 figure 2 - New resource via the Resource Browser.
A new window opens, where you can configure the following tile settings (figure 3):
Name (Name): Give your tile a name;
Units (Units): Choose whether the tile's size will be tied to the Page (Page), meaning its appearance won't change with changes in the drawing scale, or Global (Global), so that the tile follows the scale of the objects to which it is applied.
Rotate (Rotate): Set whether your tile will be rotated according to the orientation of the walls it's applied to, in in Wall (in Wall); and/or whether it will follow the rotation of the symbols it's applied to, in in Symbol (in Symbol);
Background Fill (Background Fill): Click to enable a background fill color for your tile; choose the color by clicking the bar next to it.
Click OK to confirm and start drawing the tile.
figure 2 - New resource via the Resource Browser.
A new window opens, where you can configure the following tile settings (figure 3):
Name (Name): Give your tile a name;
Units (Units): Choose whether the tile's size will be tied to the Page (Page), meaning its appearance won't change with changes in the drawing scale, or Global (Global), so that the tile follows the scale of the objects to which it is applied.
Rotate (Rotate): Set whether your tile will be rotated according to the orientation of the walls it's applied to, in in Wall (in Wall); and/or whether it will follow the rotation of the symbols it's applied to, in in Symbol (in Symbol);
Background Fill (Background Fill): Click to enable a background fill color for your tile; choose the color by clicking the bar next to it.
Click OK to confirm and start drawing the tile.
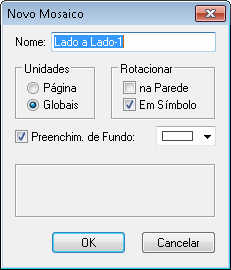 figure 3 - New tile.
Notice that the drawing window is shown with an orange marker around it, indicating that you are in the tile drawing area (figure 4):
figure 3 - New tile.
Notice that the drawing window is shown with an orange marker around it, indicating that you are in the tile drawing area (figure 4):
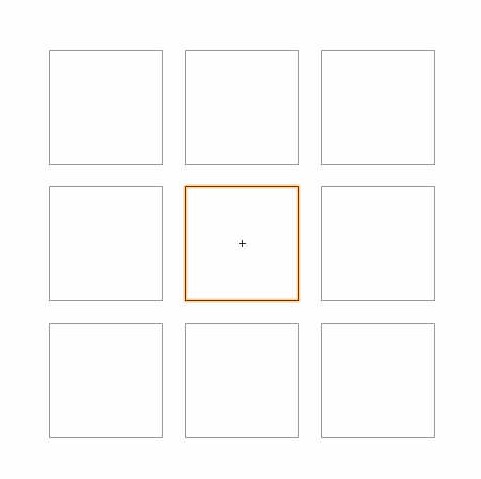
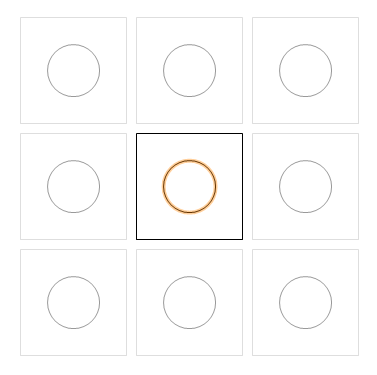 figure 4 - Drawing window.
Draw a rectangle that will serve as a boundary marker for the tile. Notice that, once you finish drawing the rectangle, Vectorworks shows clones of that object (in gray), showing what the final result of the tile would look like;
Click and drag an edge of any gray clone to the corresponding edge of the original rectangle to correct the tile's repetition;
Create, inside the rectangle, the tile design you want, always using 2D objects;
If you don't want the reference rectangle to be part of the tile, delete it.
Click Exit Tile (Exit Tile) to confirm its creation (figure 5).
figure 4 - Drawing window.
Draw a rectangle that will serve as a boundary marker for the tile. Notice that, once you finish drawing the rectangle, Vectorworks shows clones of that object (in gray), showing what the final result of the tile would look like;
Click and drag an edge of any gray clone to the corresponding edge of the original rectangle to correct the tile's repetition;
Create, inside the rectangle, the tile design you want, always using 2D objects;
If you don't want the reference rectangle to be part of the tile, delete it.
Click Exit Tile (Exit Tile) to confirm its creation (figure 5).
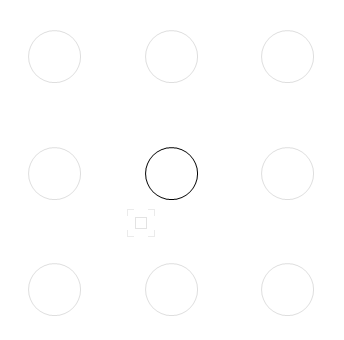
 figure 5 - To exit editing mode.
In the Resource Browser (Resource Browser) palette, notice that the tile is saved in the resources area of your file.
figure 5 - To exit editing mode.
In the Resource Browser (Resource Browser) palette, notice that the tile is saved in the resources area of your file.
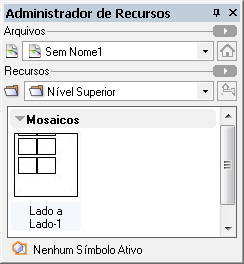 figure 6 - Resource Browser.
To apply the tile to an object, select it and then double-click the tile's thumbnail in the Resource Browser (Resource Browser) palette. You can also click the tile's thumbnail and drag it onto the object to apply it (figure 7).
figure 6 - Resource Browser.
To apply the tile to an object, select it and then double-click the tile's thumbnail in the Resource Browser (Resource Browser) palette. You can also click the tile's thumbnail and drag it onto the object to apply it (figure 7).
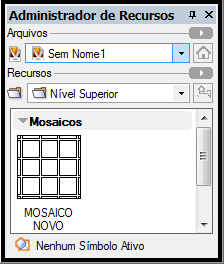
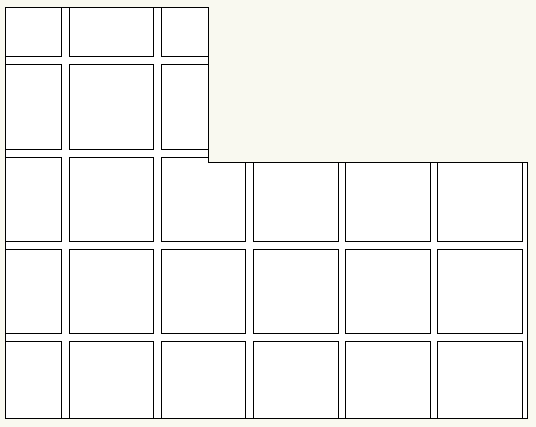 figure 7 - Applying the tile.
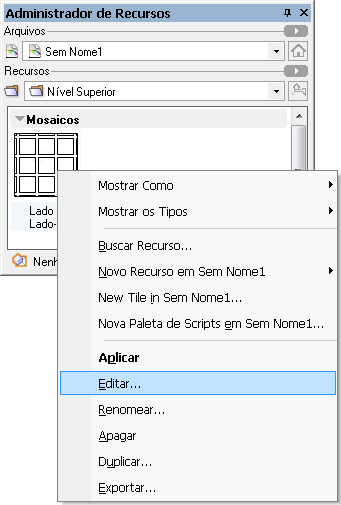 figure 8 - To edit a tile.
In the window that opens, choose between (figure 9):
figure 8 - To edit a tile.
In the window that opens, choose between (figure 9):
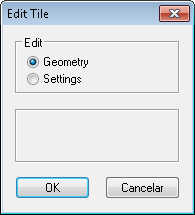 figure 9 - Editing types.
Geometry (Geometry): Choose this option to edit the tile's drawing. Modify the tile as you like and then click Exit Tile (Exit Tile);
Settings (Settings): This option brings back the tile's configuration window, so you can change its name, background color, and other settings.
Click OK to confirm your choice.
If you want to edit a tile applied to an object but don't know its name, right-click on the object and choose Locate Tile in Resource Browser (Locate Tile in Resource Browser); then right-click on the tile and choose the Edit... (Edit...) option (figure 10).
figure 9 - Editing types.
Geometry (Geometry): Choose this option to edit the tile's drawing. Modify the tile as you like and then click Exit Tile (Exit Tile);
Settings (Settings): This option brings back the tile's configuration window, so you can change its name, background color, and other settings.
Click OK to confirm your choice.
If you want to edit a tile applied to an object but don't know its name, right-click on the object and choose Locate Tile in Resource Browser (Locate Tile in Resource Browser); then right-click on the tile and choose the Edit... (Edit...) option (figure 10).
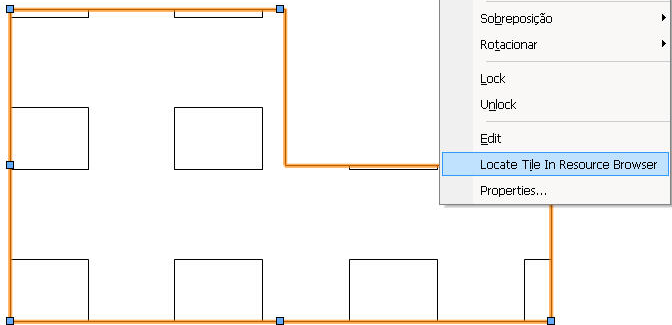 figure 10 - Locating the tile in use.
figure 1 - Window/Palettes/Resource Browser menu.
Click the arrow-shaped button next to the Resources (Resources) title; move the cursor over the New Resource in... (New Resource in...) option and then choose the Tile... (Tile...) option (figure 2).
figure 2 - New resource via the Resource Browser.
A new window opens, where you can configure the following tile settings (figure 3):
Name (Name): Give your tile a name;
Units (Units): Choose whether the tile's size will be tied to the Page (Page), meaning its appearance won't change with changes in the drawing scale, or Global (Global), so that the tile follows the scale of the objects to which it is applied.
Rotate (Rotate): Set whether your tile will be rotated according to the orientation of the walls it's applied to, in in Wall (in Wall); and/or whether it will follow the rotation of the symbols it's applied to, in in Symbol (in Symbol);
Background Fill (Background Fill): Click to enable a background fill color for your tile; choose the color by clicking the bar next to it.
Click OK to confirm and start drawing the tile.
figure 3 - New tile.
Notice that the drawing window is shown with an orange marker around it, indicating that you are in the tile drawing area (figure 4):
figure 4 - Drawing window.
Draw a rectangle that will serve as a boundary marker for the tile. Notice that, once you finish drawing the rectangle, Vectorworks shows clones of that object (in gray), showing what the final result of the tile would look like;
Click and drag an edge of any gray clone to the corresponding edge of the original rectangle to correct the tile's repetition;
Create, inside the rectangle, the tile design you want, always using 2D objects;
If you don't want the reference rectangle to be part of the tile, delete it.
Click Exit Tile (Exit Tile) to confirm its creation (figure 5).
figure 5 - To exit editing mode.
In the Resource Browser (Resource Browser) palette, notice that the tile is saved in the resources area of your file.
figure 6 - Resource Browser.
To apply the tile to an object, select it and then double-click the tile's thumbnail in the Resource Browser (Resource Browser) palette. You can also click the tile's thumbnail and drag it onto the object to apply it (figure 7).
figure 7 - Applying the tile.
how to modify a tile
Locate the tile you want to edit in the Resource Browser (Resource Browser) palette; then right-click on it and choose the Edit... (Edit...) option (figure 8).
figure 8 - To edit a tile.
In the window that opens, choose between (figure 9):
figure 9 - Editing types.
Geometry (Geometry): Choose this option to edit the tile's drawing. Modify the tile as you like and then click Exit Tile (Exit Tile);
Settings (Settings): This option brings back the tile's configuration window, so you can change its name, background color, and other settings.
Click OK to confirm your choice.
If you want to edit a tile applied to an object but don't know its name, right-click on the object and choose Locate Tile in Resource Browser (Locate Tile in Resource Browser); then right-click on the tile and choose the Edit... (Edit...) option (figure 10).
figure 10 - Locating the tile in use.