Advanced Modeling with the Profile Manager
·2 min read
how to create a new profile with the Profile Manager
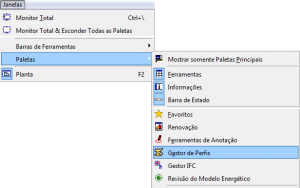
The Profile Manager lets you create complex sections for building beams, columns, and walls. To create a new profile, go to the Window/Palettes/Profile Manager menu.
figure 1 - location of the Profile Manager palette In the Profile Manager palette, click the New button to open a new window where you will draw the desired profile. Choose which tool this profile will be available for (Wall, Beam, or Column) and, in the Profile Editor window, draw the profile using the 2D drawing tools Line and Arc/Circle. Pay attention to how the section drawing must be aligned - this varies depending on the tool that will be used later. If the profile is for a wall, its side face must be positioned at the origin; if the profile is for a beam, the central axis of the beam's X coordinate must be positioned at the origin; if the profile is for a column, the geometric center of the profile must be positioned at the origin, as shown in figure 3.
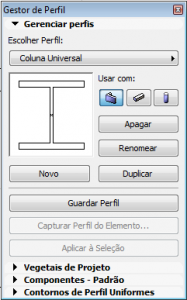


 figure 2 - Profile Manager palette figure 3 - position of the elements at the origin
Once the profile is drawn, it needs to be filled with a fill pattern of your choice. The Magic Wand is a good option for filling it in.
figure 2 - Profile Manager palette figure 3 - position of the elements at the origin
Once the profile is drawn, it needs to be filled with a fill pattern of your choice. The Magic Wand is a good option for filling it in.
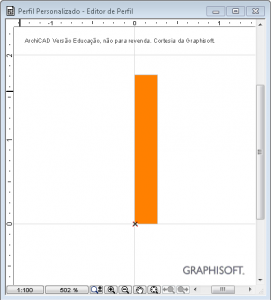 figure 4 - profile drawn with lines and filled with a solid fill In the Design Layers tab, you can enable the Horizontal Stretch option to edit the profile's horizontal dimension after it has been defined in this window; Vertical Stretch to edit the profile's vertical dimension after it has been defined in this window; and Opening Reference to show a line indicating the placement of doors and windows in complex-section walls (this line can be edited like any other line so it matches the profile's shape and openings are inserted correctly).
In the Components - Default tab, if you wish, make more advanced adjustments that will be treated as the profile's default settings. You can set the priority level, materials displayed in the 3D Window and other attributes. To finish, click the Store Profile button.
figure 4 - profile drawn with lines and filled with a solid fill In the Design Layers tab, you can enable the Horizontal Stretch option to edit the profile's horizontal dimension after it has been defined in this window; Vertical Stretch to edit the profile's vertical dimension after it has been defined in this window; and Opening Reference to show a line indicating the placement of doors and windows in complex-section walls (this line can be edited like any other line so it matches the profile's shape and openings are inserted correctly).
In the Components - Default tab, if you wish, make more advanced adjustments that will be treated as the profile's default settings. You can set the priority level, materials displayed in the 3D Window and other attributes. To finish, click the Store Profile button.
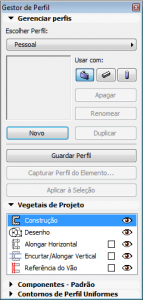 figure 5 - Profile Manager palette
Finally, give the profile a name and click OK.
figure 5 - Profile Manager palette
Finally, give the profile a name and click OK.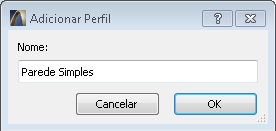 figure 6 - completing the complex profile
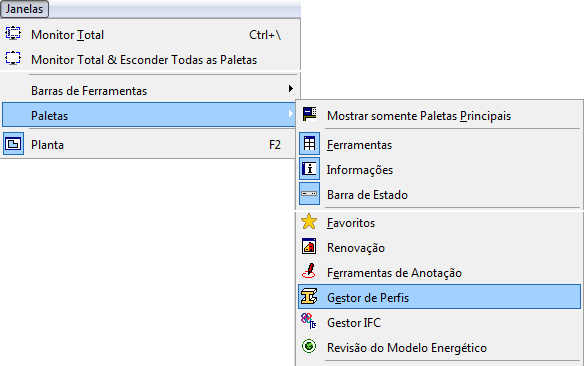 figure 1 - location of the Profile Manager palette In the Profile Manager palette, click the New button to open a new window where you will draw the desired profile. Choose which tool this profile will be available for (Wall, Beam, or Column) and, in the Profile Editor window, draw the profile using the 2D drawing tools Line and Arc/Circle. Pay attention to how the section drawing must be aligned - this varies depending on the tool that will be used later. If the profile is for a wall, its side face must be positioned at the origin; if the profile is for a beam, the central axis of the beam's X coordinate must be positioned at the origin; if the profile is for a column, the geometric center of the profile must be positioned at the origin, as shown in figure 3.
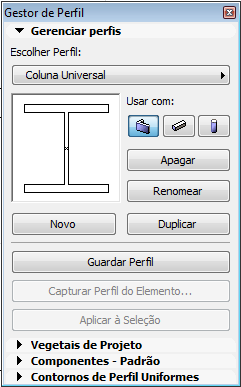 figure 2 - Profile Manager palette figure 3 - position of the elements at the origin
Once the profile is drawn, it needs to be filled with a fill pattern of your choice. The Magic Wand is a good option for filling it in.
figure 2 - Profile Manager palette figure 3 - position of the elements at the origin
Once the profile is drawn, it needs to be filled with a fill pattern of your choice. The Magic Wand is a good option for filling it in.
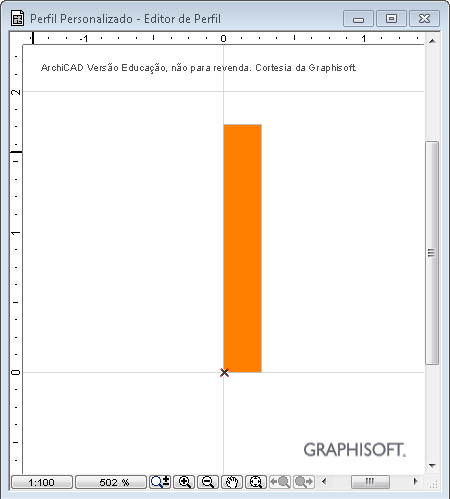 figure 4 - profile drawn with lines and filled with a solid fill In the Design Layers tab, you can enable the Horizontal Stretch option to edit the profile's horizontal dimension after it has been defined in this window; Vertical Stretch to edit the profile's vertical dimension after it has been defined in this window; and Opening Reference to show a line indicating the placement of doors and windows in complex-section walls (this line can be edited like any other line so it matches the profile's shape and openings are inserted correctly).
In the Components - Default tab, if you wish, make more advanced adjustments that will be treated as the profile's default settings. You can set the priority level, materials displayed in the 3D Window and other attributes. To finish, click the Store Profile button.
figure 4 - profile drawn with lines and filled with a solid fill In the Design Layers tab, you can enable the Horizontal Stretch option to edit the profile's horizontal dimension after it has been defined in this window; Vertical Stretch to edit the profile's vertical dimension after it has been defined in this window; and Opening Reference to show a line indicating the placement of doors and windows in complex-section walls (this line can be edited like any other line so it matches the profile's shape and openings are inserted correctly).
In the Components - Default tab, if you wish, make more advanced adjustments that will be treated as the profile's default settings. You can set the priority level, materials displayed in the 3D Window and other attributes. To finish, click the Store Profile button.
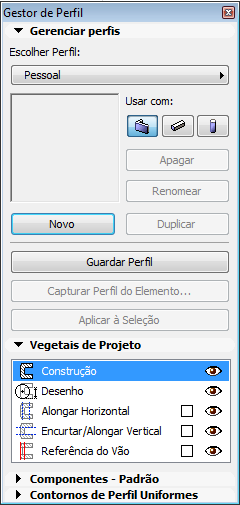 figure 5 - Profile Manager palette
Finally, give the profile a name and click OK.
figure 6 - completing the complex profile
figure 5 - Profile Manager palette
Finally, give the profile a name and click OK.
figure 6 - completing the complex profile


