Creating Faces from a Section Cut
·1 min read
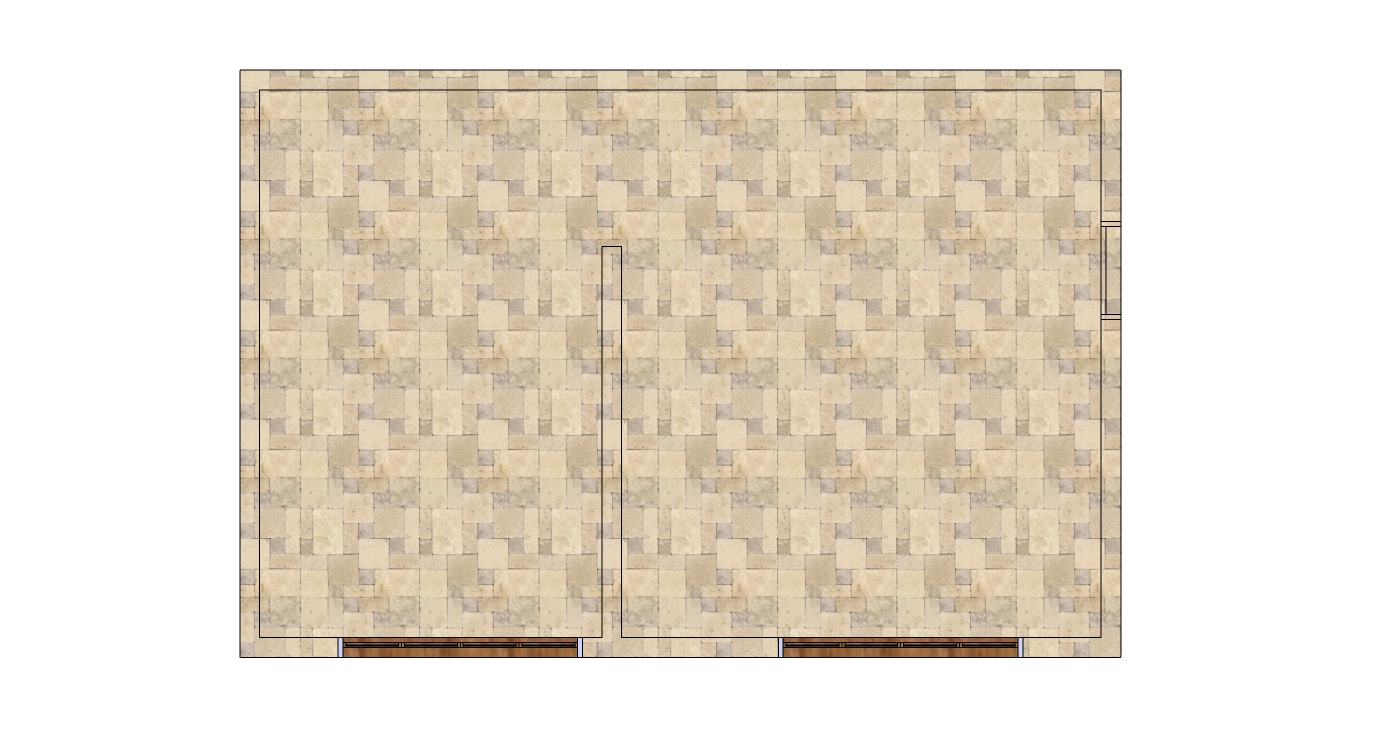
When you use a section plane to create a view, you can only configure the color and thickness of the cut line in the Styles (Styles) window. If you want to color the face that's being cut, use the Create group from slice (Create group from slice) feature.
[caption id="attachment_382" align="aligncenter" width="600"] Floor plan using a horizontal section plane.[/caption]
[caption id="" align="alignnone" width="600"]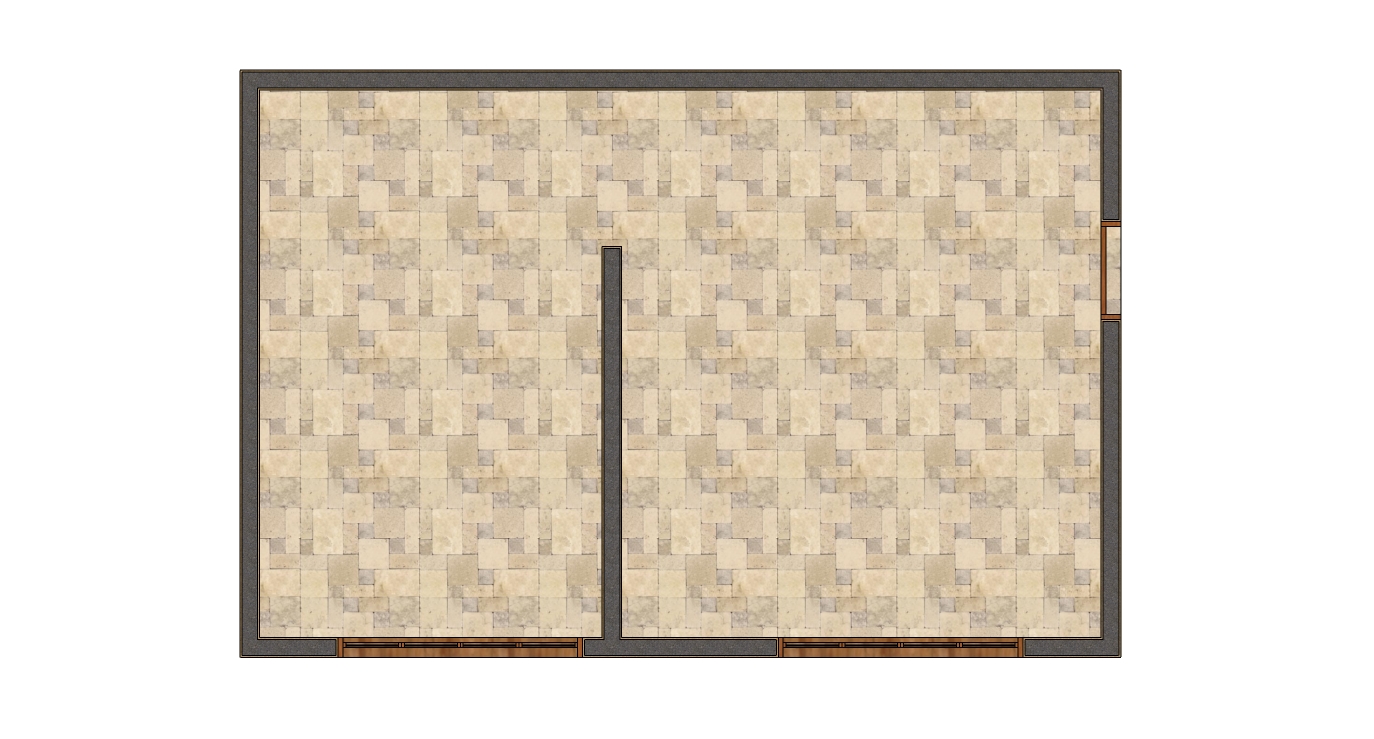 Floor plan with a colored sectioned face.[/caption]
To set up the cut face, right-click on the section plane and choose Create group from slice. Using the Outliner (Outliner) window, select the created group and move it down a few millimeters so it displays below the cutting plane.
Edit the group to create the faces, then apply the materials.
[caption id="attachment_381" align="aligncenter" width="600"]
Floor plan with a colored sectioned face.[/caption]
To set up the cut face, right-click on the section plane and choose Create group from slice. Using the Outliner (Outliner) window, select the created group and move it down a few millimeters so it displays below the cutting plane.
Edit the group to create the faces, then apply the materials.
[caption id="attachment_381" align="aligncenter" width="600"]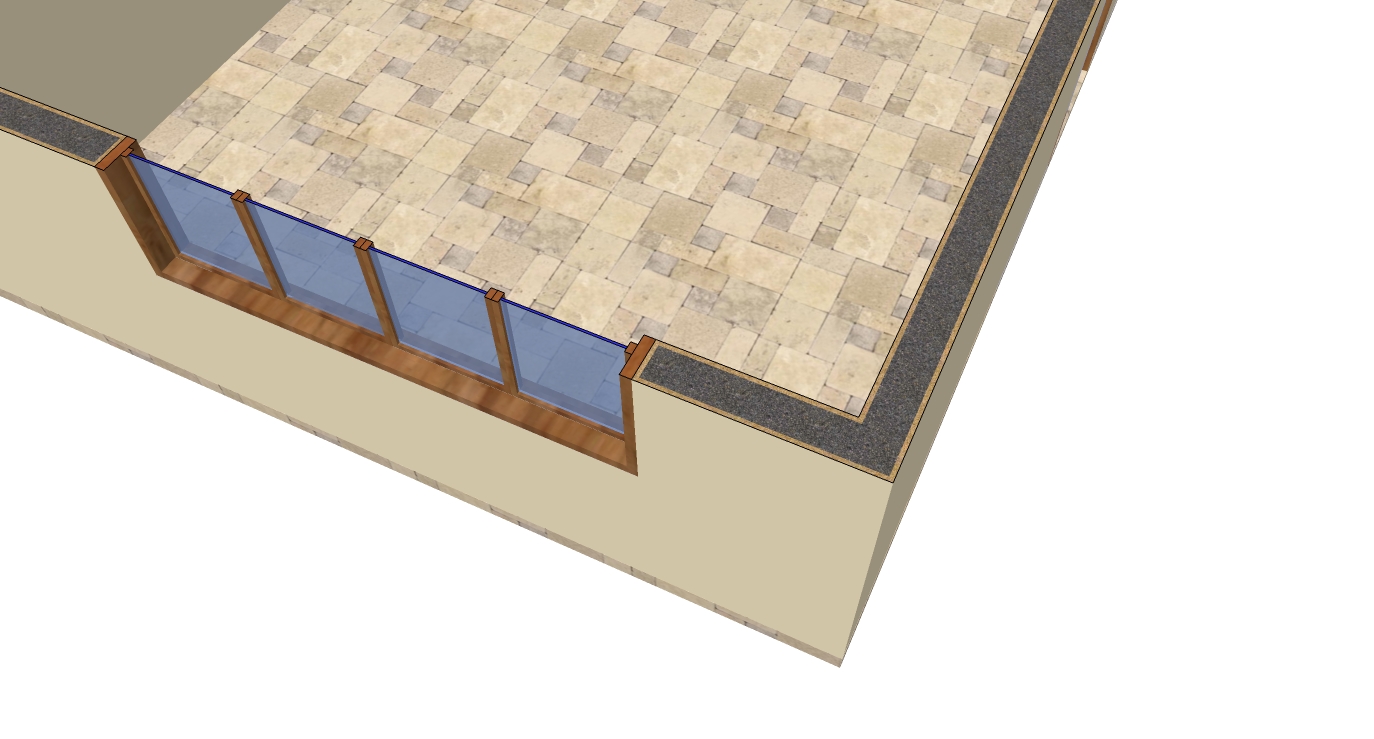 Textures applied to the sectioned faces of the walls, frame, and glass.[/caption]
This process can be made easier with the SectionCutFace plugin, which creates faces from the section plane. Download the plugin here:
http://rhin.crai.archi.fr/RubyLibraryDepot/plugin_details.php?id=361
Textures applied to the sectioned faces of the walls, frame, and glass.[/caption]
This process can be made easier with the SectionCutFace plugin, which creates faces from the section plane. Download the plugin here:
http://rhin.crai.archi.fr/RubyLibraryDepot/plugin_details.php?id=361
Floor plan using a horizontal section plane.[/caption]
[caption id="" align="alignnone" width="600"] Floor plan with a colored sectioned face.[/caption]
To set up the cut face, right-click on the section plane and choose Create group from slice. Using the Outliner (Outliner) window, select the created group and move it down a few millimeters so it displays below the cutting plane.
Edit the group to create the faces, then apply the materials.
[caption id="attachment_381" align="aligncenter" width="600"] Textures applied to the sectioned faces of the walls, frame, and glass.[/caption]
This process can be made easier with the SectionCutFace plugin, which creates faces from the section plane. Download the plugin here:
http://rhin.crai.archi.fr/RubyLibraryDepot/plugin_details.php?id=361


